🚀 VMOS Edge Quick Start
This guide will walk you step by step through configuring the VMOS Edge hardware host. In just five steps, you will be able to control multiple cloud Android systems from your computer as if they were physical phones.
📦 Step 1: Unboxing Check and Hardware Connection
Before you begin, please make sure all hardware connections are correct. This is the foundation for stable system operation.
1. Verify items in the box
Check that the package includes the following:
- VMOS Edge host x1
- Power adapter x1
2. Install the M.2 NVMe SSD (required)
Before officially starting, you must prepare and install a compliant M.2 SSD yourself.
📋 SSD purchase recommendations
To ensure device performance and stability when running multiple cloud phones, please follow these guidelines:
- Protocol type: Only NVMe protocol is supported (Note: M.2 SATA protocol is not supported).
- Physical size: M.2 2280 (the most common specification).
- Capacity recommendation: It is strongly recommended to choose 256GB or larger.
- Reason: Each cloud phone instance consumes image and cache space. A capacity of 256GB or more helps keep the system smooth when creating multiple cloud machines and also extends SSD lifespan.
📋 Official Tested SSD Reference Table
The following models have all undergone official or community compatibility testing by VMOS Edge and are recommended for priority selection:
| Brand | Core Model |
|---|---|
| Samsung | PM9C1B Gen4x4 MODEL MZ-VL8512D |
| Samsung | V-NAND SSD 890 |
| Samsung | MZ-VLB2T0B |
| Samsung | PM9B1 256GB Gen4X4, MODEL MZ-VL42560 2330 |
| Samsung | PM9B1 256GB Gen4X4, MODEL MZ-VL42560 2337 |
| SOLIDIGM | P41Plus MODEL:SSDPFKNU512GZ |
| OEM MAXIO | Technology (Hangzhou) Ltd. NVMe SSD Controller MAP1202 (rev 01) |
| Great Wall | GW7000 4TB BS |
| SanDisk | sandisk A3N/m.2nvme2280/Read up to 2400-3200 |
| X3N | /m.2nvme2280/PCIE4.0 Read up to 5000-5150 |
| Western Digital (WD) | SN350 GREEN NVMe M.2 |
| Biwin | AP476 NVMe M.2 2280 SSD |
| KingSpec | m.2 nvme SSD ME 2280 GEN3x4 |
| GALAX Black General W | 500-M.2 PCIE-E 2280 |
| JinYiXing | M.2 NVME PCIe3.0 OEM Controller RTS5770DL |
| Fanxiang | s500pro 256GB |
🛠️ Installation steps
Model A:
- Open the cover: Turn the host upside down, open the magnetic bottom cover, and remove the reserved M.2 fixing screw.
- Insert the SSD: Align the gold fingers of the M.2 NVMe SSD with the slot, insert at an angle of about 30 degrees, and ensure it is fully seated.
- Secure and close: Gently press the SSD down, then put the cover back and tighten the screws.
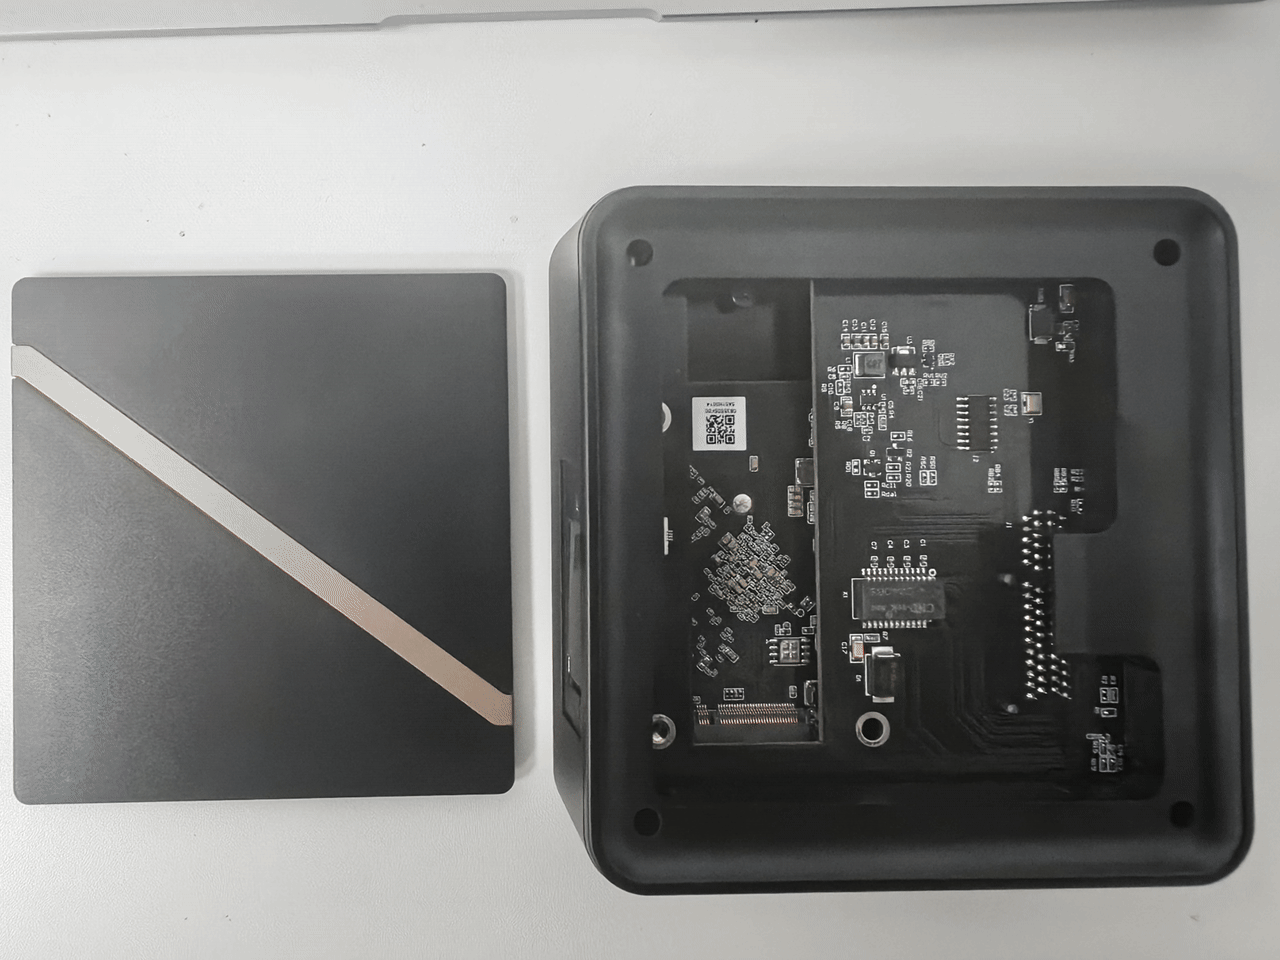
Model B:
- Open the cover: Turn the host upside down and loosen the M.2 SSD latch.
- Insert the SSD: Align the gold fingers of the M.2 NVMe SSD with the slot, insert at an angle of about 30 degrees, and ensure it is fully seated.
- Secure and close: Gently press the SSD down, then press the latch back into place.
3. Connect network and power
- Connect the network cable: Use an Ethernet cable to connect the host LAN port to the router LAN port.
Note: Make sure your computer and the host are connected to the same router.
- Connect power: Plug in the power adapter.
- Check status: Wait until the power indicator changes from blinking to solid on. This means the host system has finished booting. The screen will display the IP address, kernel version, and UUID.
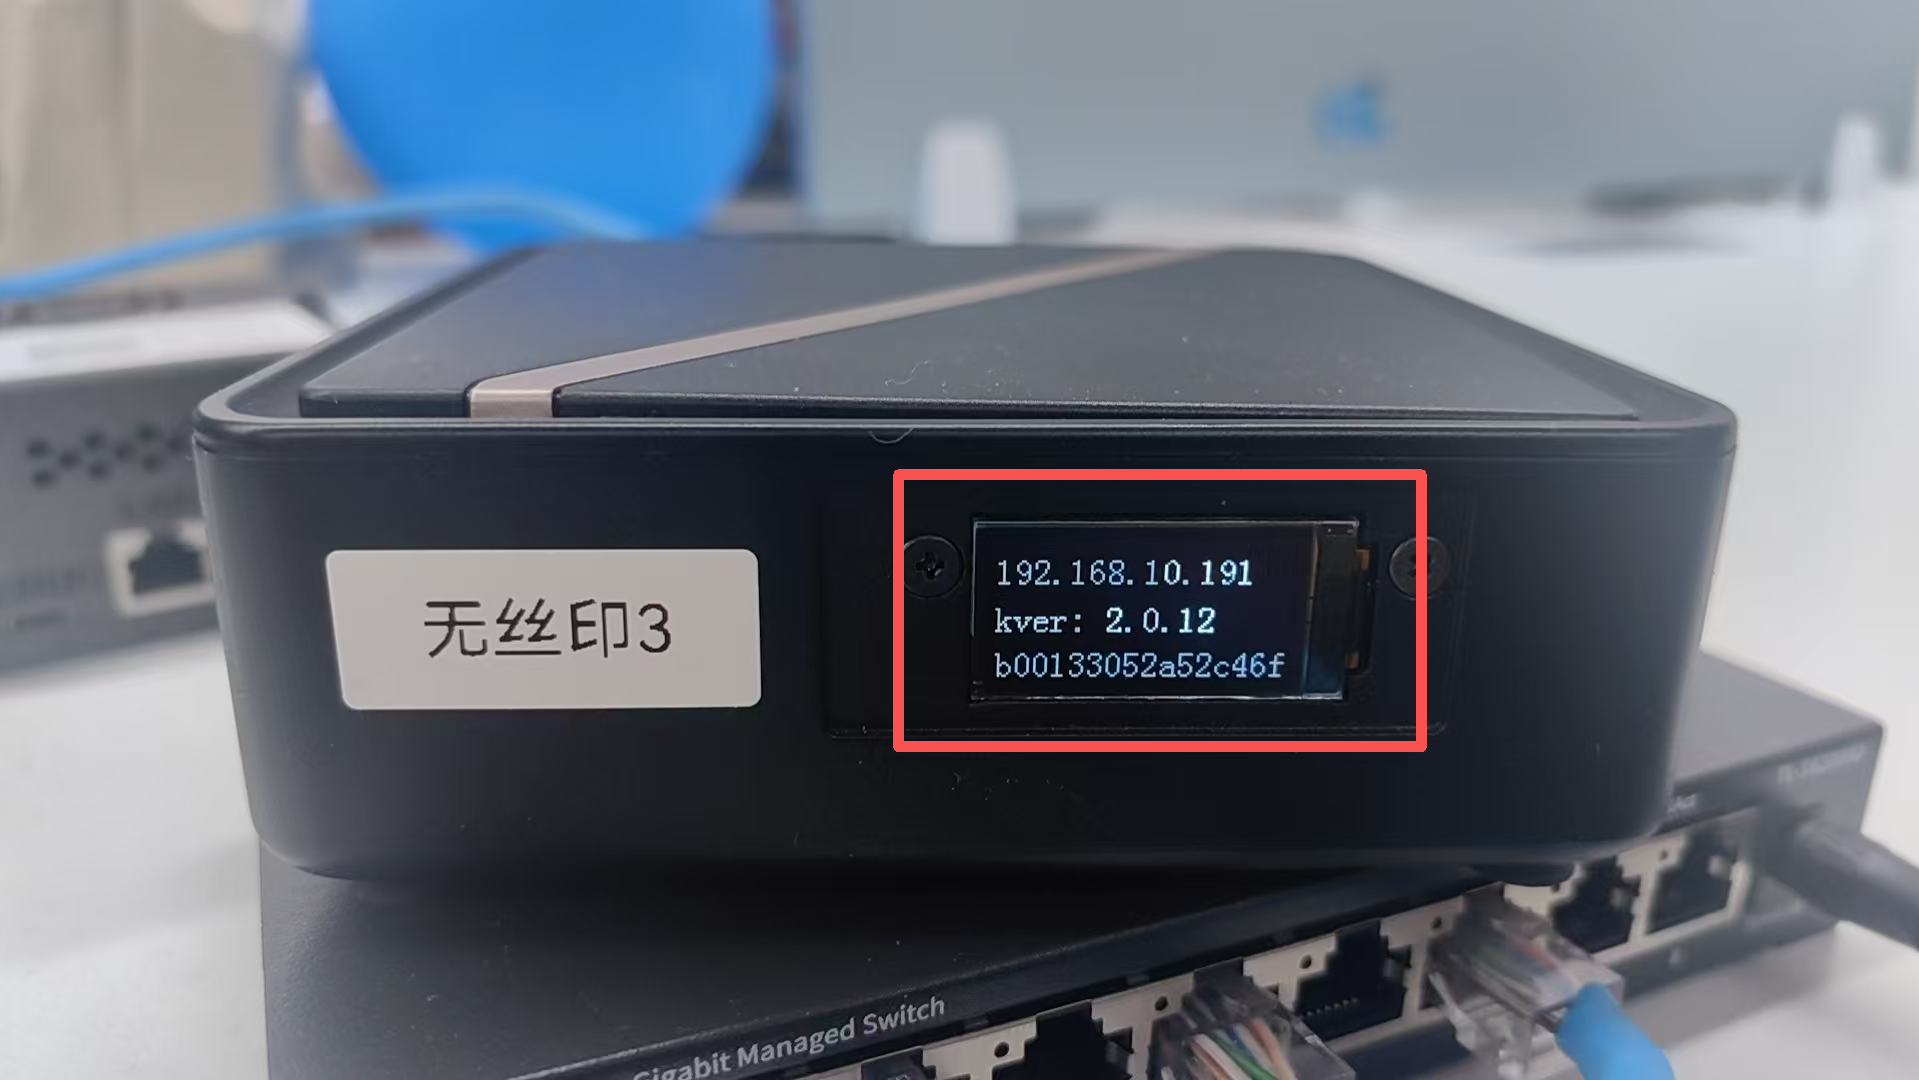
📶 A wired network connection is recommended for stable cloud phone performance and low latency.